

For any extreme sports enthusiast, an action camera is a must-have accessory. Its small size and rugged structure allow capturing the soul-stirring experiences of the wearer hand-free.
Before buying an action camera, it is a good practice to look at several aspects. Starting with the budget, you can also decide among the field of view, video quality, resolution, battery life, storage capacity, and noise reduction abilities.
Apart from these, the modern-age action cameras manifest a plethora of other smart features like touch screen, voice control, lens distortion, and remote control. All these features add to the utility and ease of handling the camera while also giving you a better user experience.
Connecting an action camera to your PC can be done via various methods. However, the reasons to establish such a connection differ among the users. Hence, we will talk about the reasons for connecting it to your PC initially followed by the connection process.
Reasons to Connect an Action Camera to PC
Depending on the user, there are 5 significant reasons anyone would want to connect an action camera to the computer or laptop.
1. Data Backup and Storage
The storage capacity of action cameras depends on their compatibility with the external storage peripheral. In this case, it’s a MicroSD memory that you can insert in the camera to record videos.
Due to the limited capacity to save data, you can transfer that data to your computer that has a much larger memory capacity.
Moreover, it can also help you create a backup for the thrilling memories recorded on the camera.
And don’t worry about the PC memory filling up as you can buy a hard disk with 1TB capacity. This is enough to store 500 hours of HD video contents or more than a quarter-million photographs.
Where the on-device storage functionality has its limitations, storing the same data on the cloud gives you more liberty to access it.
Having said that, remember that online storage solutions offer free storage up to a limit. To get a higher storage capacity, you need to buy a subscription.
2. Sharing on Social Media
If you have a Youtube channel or an Instagram page dedicated to your daily life experiences, start sharing the videos and images from the action camera on your page.
Exhilarating videos of snowboarding or bungee jumping or even skydiving has a huge fan base. Sharing your videos can get you, subscribers and followers, on your social media handles.
3. Editing and Formatting
More often than not, you need to edit the pre-recorded videos before they are viewer-friendly. Editing and formatting the video is not possible on the action camera itself.
Hence, you may need to first upload the data on your PC by connecting action to it and then go about editing.
Set aside the simple functions like cropping or trimming the videos. Editing the videos on your PC takes everything on a whole new level. Specific software made for personal computers can help you transform the videos to a great extent.
4. Disk Formatting
Lower storage capacity is a real issue with the action cameras. Hence, as a user, you need to frequently free up space in your memory card to record more awesome videos.
5. Use the Action Cam as a WebCam
Remember that not all the action cameras can be turned into a makeshift webcam. Some cameras come with an added functionality that makes using them as a webcam easy. You just need to connect the action camera to the PC and start recording.

Easy Ways to Connect Your Action Camera to a PC
To connect an action camera to PC you can take three routes:
- USB Connection
- Bluetooth Connection
- WiFi Connection
Let’s begin from the USB Connection and talk about how to do it followed by its Pros and Cons.
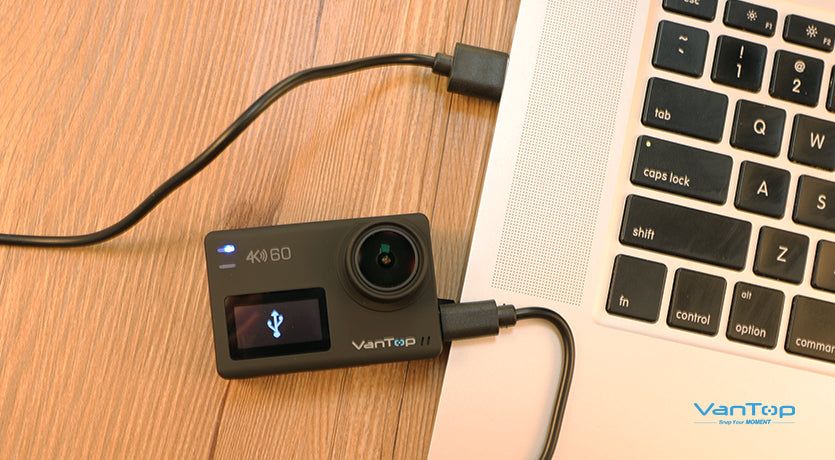
#1 USB Connection
Every action camera comes with a USB cable that will help you establish a stable connection with the PC.
Step 1: Take the cable and connect the USB end to the computer and join the other end to the camera. The type of USB cable also differs from product to product. The GoPro models mostly have USB-C type, while others may have either Micro USB-B and Mini USB.
Pro Tip: Make sure that you install the software beforehand. For the software, your action camera may be accompanied by an installation disk. If not, the software can be downloaded easily from the manufacturer’s website.
Step 2: Once you have connected the cables, you will be notified about the connection on your PC.
Pros:
●USB cables can transfer data with speed and accuracy.
●The connection is extremely stable.
Cons:
●USB connections limit the device mobility
#2 Bluetooth Connection
Moving on from the wired connection, Bluetooth connection is the first wireless option to connect an action camera to a PC.
Step 1: Ensure that you have switched on Bluetooth on both the devices, the camera, and your PC. Almost all modern PCs are inbuilt with Bluetooth.
Pro Tip: Before buying your action camera, always check whether it has Bluetooth and WiFi connectivity or not.
Step 2: After switching on the Bluetooth, open up the connection window on your PC and navigate to pair with the new device. On your camera, ensure that the Bluetooth is on Search Mode.
Step 3: Once both the devices establish a stable connection, click on “Pair” on your PC and the camera.
Step 4: Now, you can access all the files present on the camera through your PC.
Pros:
- Bluetooth connections are characterized by a lower probability of connection drop and data compromise.
- It saves you from the trouble of buying, finding, and protecting the cables.
- The Bluetooth connection is susceptible to break under several conditions.
- Works on a lower bandwidth than WiFi connections.
#3 WiFi Connection
Lastly, we have the WiFi method to connect an action camera to PC.
Step 1: Every camera has a different button setting to turn the WiFi on. You will find this information for your camera in the instruction manual. Once you have switched it on, turn to your PC and open “Network and Sharing Settings.”
Step 2: On the Networking Window, you will see the name of your action camera depicted as a new WiFi connection. Click on connect and enter the default password (you will find the password in the instruction manual).
Step 3: Once you fill in the password, you will observe that it says “No Internet Access.” This means that you cannot use the internet until your PC is connected to the action camera.
Pros:
- Actions cameras having WiFi functionality manifest better connectivity and speedy data transfer.
- The connection is protected by AES WPA2 security.
- You can also use your action camera to live stream from your PC.
Cons:
- WiFi connections tend to lose their edge if more number of devices are present in close proximity.
Troubleshooting the Connection Errors
Sometimes, you may not be able to connect an action camera to PC even though everything is right. Well, most of the time, the issue is small enough to miss even the best eye. Here are some troubleshooting tricks and tips for when you are in a fix.
1. Troubleshooting of USB Connections
If you are not able to connect your action camera to PC (these methods are common to both Mac and Windows systems) try:
- Cleaning the USB ports on both the end, PC, and the Camera.
- Check the memory card and install it again in the camera
- Try reinstalling the drivers from the original CD that came with the package.
- Try changing the USB ports, if you want a faster connection, connect to USB 3.0 ports on your PC.
- Disconnect all the devices from your PC and connect the camera alone.
2. Troubleshooting of Bluetooth Connection
Here too, the instructions are common for both Windows and Mac-based systems.
Sometimes Bluetooth connections do test your patience. Sometimes, all you need to do is check a few connections, and toggle a few buttons to get it running.
The connection errors occur because, at times, the Bluetooth hardware and software on both devices are not compatible. While the Bluetooth 5.0 can work with any older version like 2.1 or higher.
Some action camera devices are also equipped with Bluetooth Smart, which is basically a low-energy Bluetooth version. The key issue is that Bluetooth Smart and the other version works with different protocols.
So, if either of your devices has an older version, connecting them can be a bane for the users.
For other sorts of connection issues between action cameras and your PC, make sure that you check the following:
- Keep both the devices near each other. Some devices have a very low threshold for developing a connection. Trespass that limit, and you can risk breaking or not forming a connection.
- Try turning the device on and off once, both of them.
- If your PC has some old Bluetooth connection in history, try removing them. Sometimes, the PC might be trying to automatically connect to an old device, and the camera cannot get a gateway to initiate a connection.
- Check the battery levels of your devices. Smart devices turn off the on lower power.
- Try deleting the device from the list and try reconnecting them from scratch. This works especially with the Mac.
- If you are working in a spot that has close proximity to the WiFi Router, try moving your action camera away from it. Since both the technologies, WiFi, and Bluetooth work on the same spectrum, they can interfere with each other’s connectivity. However, WiFi-enabled devices are built to overpower these interferences, Bluetooth devices are not.
- Check the Bluetooth drivers on your PC, if need be, reinstall or upgrade them.
3. Troubleshooting of WiFi Connection
Not all the action cameras come equipped with a Wifi, so at first, you need to ensure that your action camera is enabled with WiFi.
The process to connect an action camera to a PC is explained above. However, if you are unable to establish a connection, you can check a few things.
- Connecting via WiFi can be hindered if there are a lot of devices located near to the devices.
- Check the WiFi SSID and Password, ensuring that you are entering the right details.
- Action cameras can only connect to a single device in one instance. Check if it is still connected to your mobile phone or any other device.
- Restart the Camera, turn on the WiFi, and wait for 10 seconds to start making a connection.
Conclusion
Action cameras accord a superlative shooting experience to the users. They are easy to use, come with pre-set configurations, and allow capturing excitement-filled memories.
More importantly, the smaller size of these cameras gives benefits like portability and easy handling and is easy to install. This guide will help you connect the action camera to PC with three modes and gives actionable suggestions for troubleshooting.
